
14 Farmhouse Halloween Porch Decor Ideas for DIY Lovers

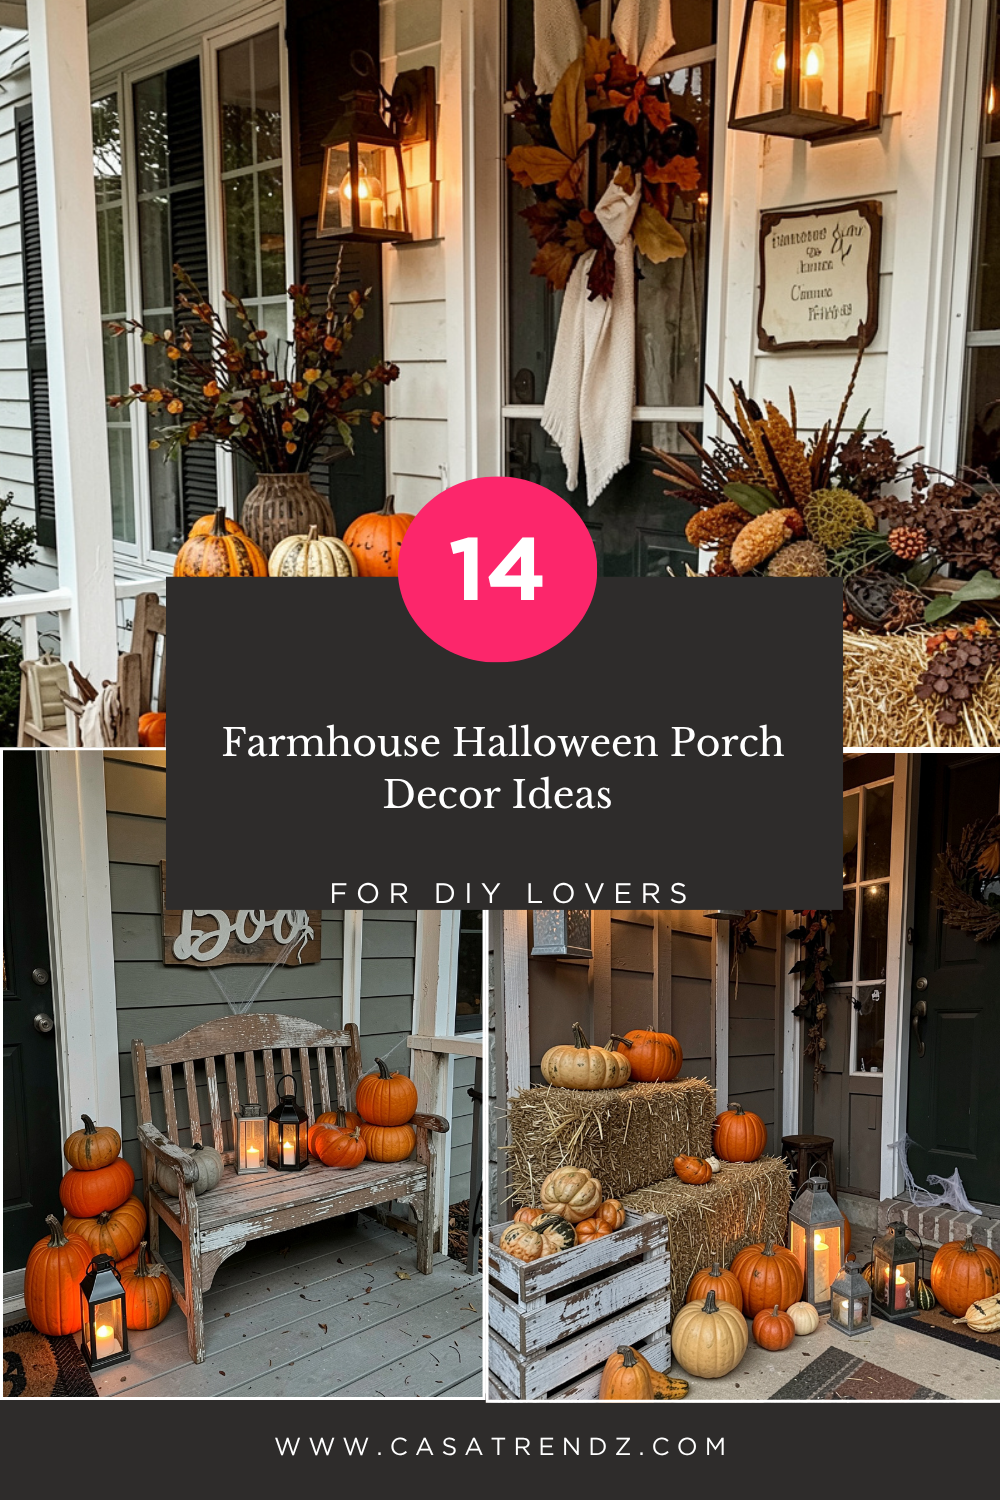
Farmhouse Halloween decor works because it balances two things that seem hard to mix: rustic comfort and genuine spookiness. A weathered crate, a burlap ribbon, and a glowing lantern feel warm and welcoming, but add a ghost garland or a grinning skeleton and the same porch suddenly feels like Halloween night. That mix is what makes this style so popular, and it is also what makes it so good for DIY lovers, because the materials are cheap, the projects are forgiving, and the imperfections are part of the look.
In this guide you will find 14 farmhouse Halloween porch decor ideas, each one with the supplies it needs, clear step-by-step directions, and practical tips for building it well. Most of these projects reuse the same core materials, so once you have started your first one, the rest come together quickly. Expect a fully styled porch in a weekend, not a month.
The basic farmhouse Halloween kit: wooden crates and pallets (or scrap wood), burlap ribbon and jute twine, mason jars, galvanized metal lanterns, LED candles and warm-white string lights, real or faux pumpkins in orange, white, and green, hay bales, chalk paint or matte acrylics in black, white, and burnt orange, a hot glue gun, and outdoor sealant spray. With this kit on hand, you can build nearly everything on this list.
1. Rustic Pumpkin Crate Stack Display
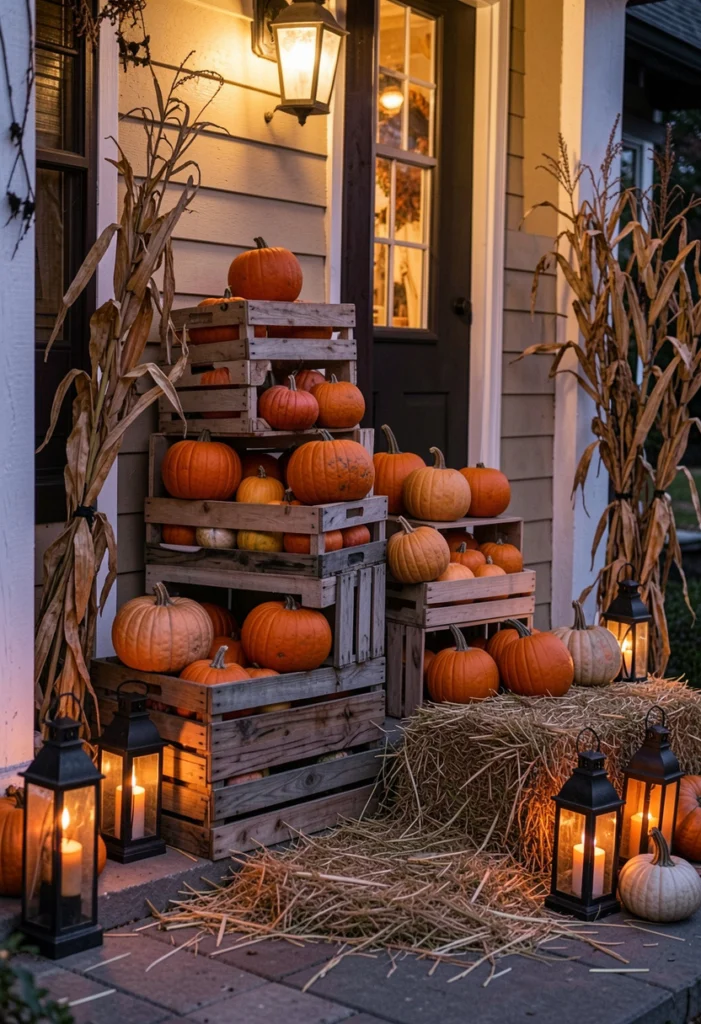
A crate stack is the fastest way to add height and structure to your porch, which is what separates a styled display from a few pumpkins sitting on the ground. Stack two or three wooden crates at staggered heights near your front door, turning some on their sides so the open ends face out like little shelves. A mix of crate finishes works best here: one weathered gray, one natural pine, and one lightly stained brown. If you do not have real crates, build simple ones from 1 x 6 pine boards; each crate takes about 30 minutes with a drill and wood glue.
How to do it: Sand rough edges so nobody gets splinters, then lightly distress the wood with a palm sander or 80-grit sandpaper for that worn farmhouse look. Fill each crate with pumpkins in three sizes (large, medium, mini) and mix the colors: classic orange, white ghost pumpkins, and muted green Cinderella varieties. Tuck dried corn stalks or eucalyptus sprigs between the pumpkins to hide any gaps. Lean one crate against the porch railing at an angle for a casual, unstructured feel.
Weather tip: Real pumpkins soften faster when they sit directly on wood in rain. Set each pumpkin on a small square of scrap wood or a saucer so air circulates underneath. For a display that lasts all October, use high-quality faux pumpkins on the crates and save the real carved ones for the final week. If your entryway needs a matching piece at the door itself, our guide to DIY Halloween door mat ideas has 15 painted designs that pair perfectly with this display.
2. DIY Burlap Ghost Garland
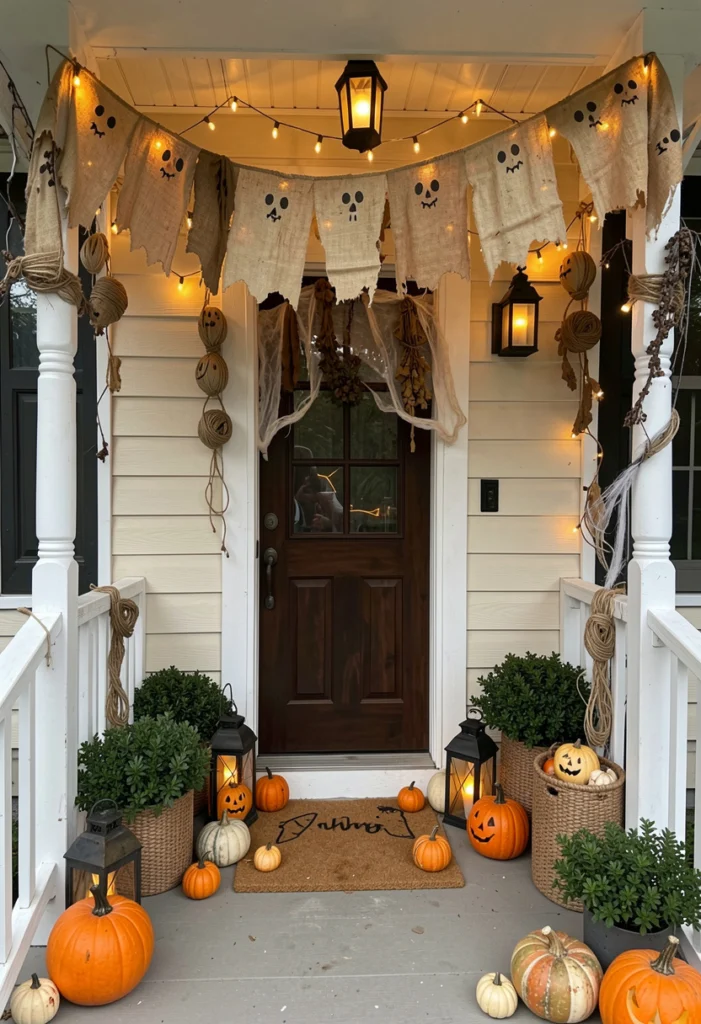
Burlap ghosts are the ideal first project because they cost almost nothing and look cute from the street, which is the whole point of a porch display. Each ghost is a small ball wrapped in burlap and tied with twine, with a simple painted face. Hang them from the porch railing, the eaves, or across a window, and they move gently in the breeze, which makes the display feel alive.
How to do it: Cut burlap into 8-inch squares. Place a cotton ball or a small foam ball in the center of each square, gather the fabric around it, and tie it tightly with a 6-inch length of jute twine. Trim the tails of the twine to different lengths so the ghosts hang at slightly different heights. Use a black paint pen or permanent marker to draw faces: simple dot eyes and an oval mouth read best from a distance. String 8 to 12 ghosts onto a longer piece of twine, spacing them 6 inches apart.
Make it spooky or cute: For a friendly look, give the ghosts smiling faces and cream-colored burlap. For a creepier effect, use darker burlap and draw hollow oval eyes with jagged mouths. If the ghosts will hang in rain, spray the finished garland with a water-repellent fabric spray; otherwise bring it onto the porch roof overhang during heavy storms. This garland also works well indoors across a mantel after Halloween if you swap the ghost faces for plain ties.
3. Galvanized Metal Lantern Glow Setup
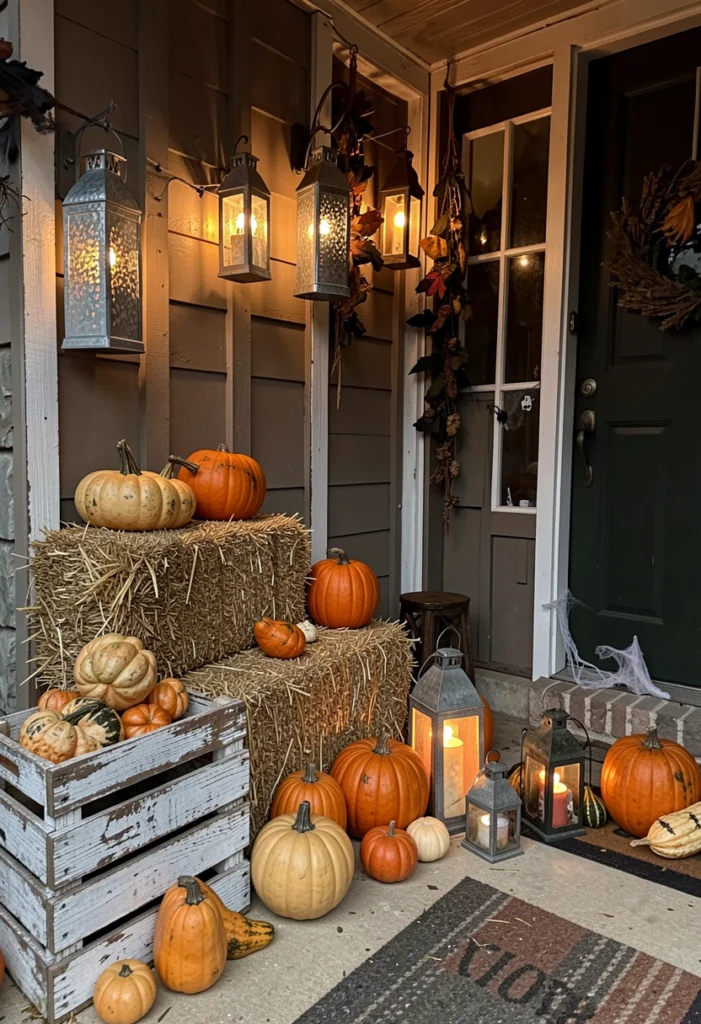
Galvanized metal lanterns are the signature farmhouse light source, and at Halloween they do double duty: the warm glow inside makes the porch feel cozy, while the cool gray metal keeps the scene from looking like generic fall decor. Buy plain lanterns in three heights (roughly 8, 12, and 16 inches tall) and group them in odd numbers, which always looks more natural than pairs.
How to do it: Fill each lantern with an LED candle or a short string of warm-white fairy lights on a timer so they switch on automatically at dusk. Wrap burlap ribbon around the lantern handles and hot glue a small dried leaf, a mini pumpkin charm, or a black felt bat to each one for a Halloween touch. Arrange the cluster beside your front door or at the base of the steps, largest lantern in the middle and smaller ones flanking it. Add one black candle or a strand of orange fairy lights in the tallest lantern to give the cluster a subtle eerie edge.
Safety note: Always use battery LED candles rather than real flames on a porch, where wind, dry leaves, and decorations are a bad combination with fire. Look for LEDs with a flicker mode, which read as candlelight from the sidewalk. If your lanterns live outside year-round, a coat of clear rust-preventing spray on the metal keeps them looking good for years, which matters since these lanterns anchor your fall porch setup too, like the ideas in our fall porch decor ideas collection.
4. DIY Wooden “Boo” Porch Sign
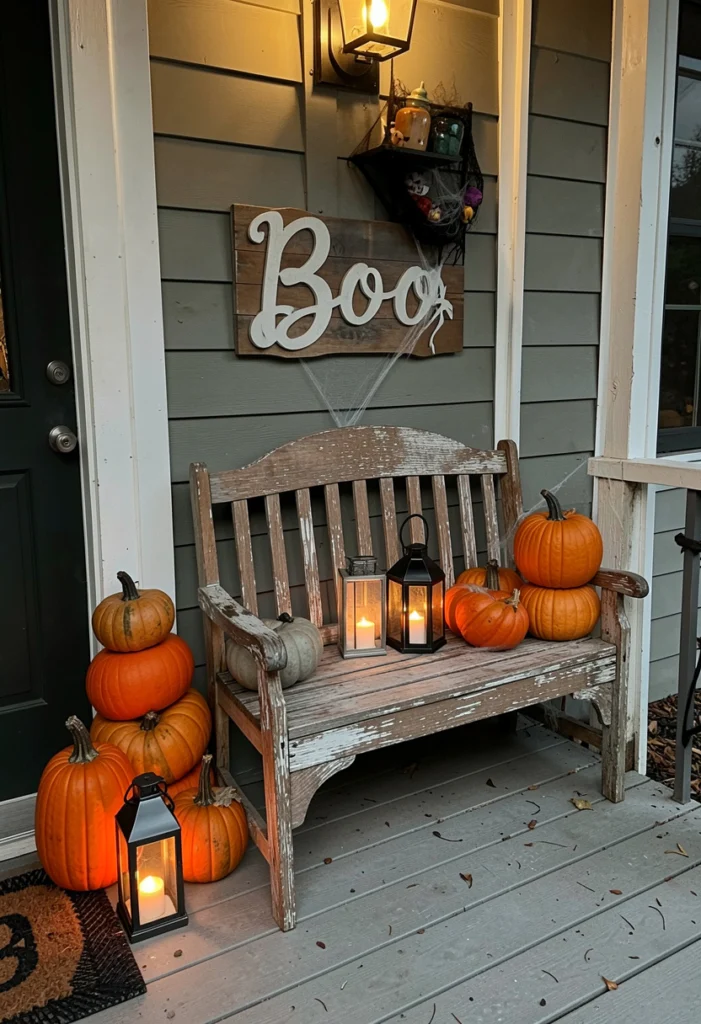
A hand-painted sign is the most personal piece you can put on a porch, and “Boo” is the classic Halloween farmhouse word: short, bold, and readable from the street. A vertical board roughly 8 inches wide and 36 inches tall leans perfectly against a wall or railing next to the door, and it takes under two hours including paint drying time.
How to do it: Start with a reclaimed fence board or pallet plank and sand it smooth enough that the paint does not catch, while leaving the nail holes and grain visible for character. Paint the background with matte chalk paint in white, cream, or distressed gray, two thin coats. Once dry, sketch the letters in chalk using a stencil or a printed font traced onto the board, then fill them with bold black or burnt orange acrylic. Add small painted details around the word: bats in the corners, a spider web, or a mini pumpkin. Seal the whole board with outdoor matte sealant.
Design tip: Farmhouse lettering looks best in a mix of one tall thin font and one chunky block font, for example “Boo” in large block letters with “happy haunting” in smaller script beneath it. If you want a double-sided sign, paint a Thanksgiving message on the back so you can flip it in November without storing it. Lean the sign at a slight angle rather than perfectly upright; perfectly straight looks staged, and a small tilt feels handmade in the right way.
5. Hay Bale Pumpkin Display Corner
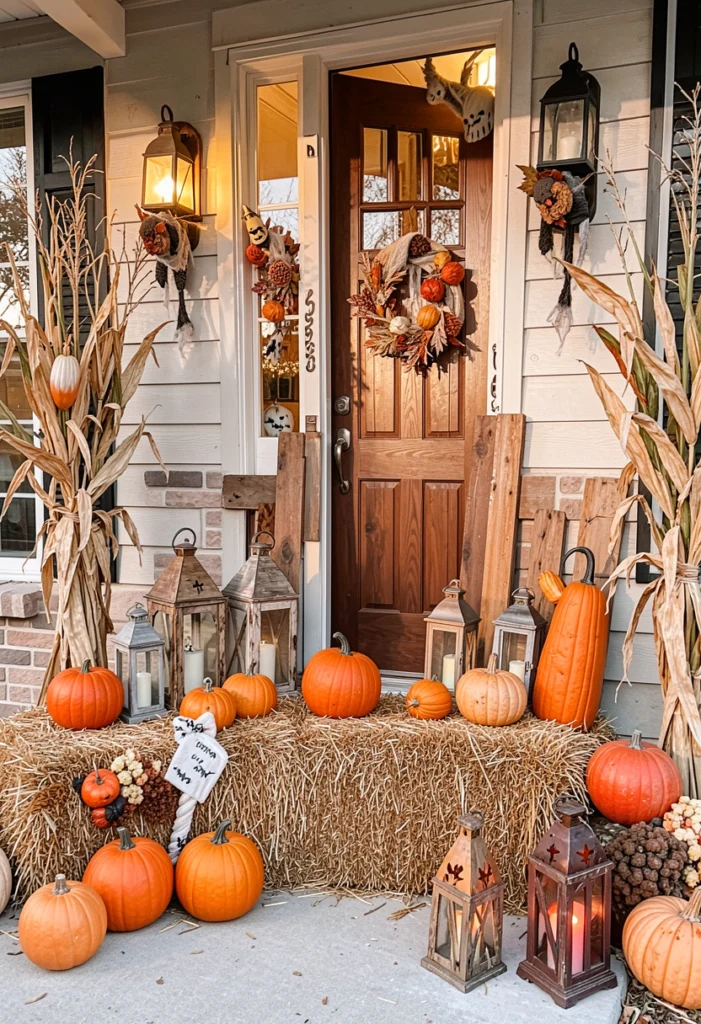
Hay bales are the backbone of outdoor farmhouse Halloween decor because they give you instant height, texture, and that unmistakable harvest smell for the price of one bag of mulch. Two or three bales stacked in a corner create a natural display shelf that needs almost no styling to look complete. Place this on the largest open section of your porch, where it becomes the focal point.
How to do it: Stack two bales side by side as the base and one on top, offset slightly. Cover the top of each bale with a burlap runner or an old feed sack to protect the twine and give the pumpkins a flat seat. Arrange pumpkins in groups of three at different points on the bales, mixing large, medium, and mini sizes plus a few gourds. Fill the gaps with dried corn stalks, faux autumn leaves, and wheat sheaves. For the Halloween layer, tuck in black lanterns, a skeleton arm, or a witch hat on a stick so it peeks above the pumpkins.
Buyer’s tip: Straw bales from a feed store are cheaper and tidier than hay bales, and they shed less. Ask for “clean straw” rather than feeding hay. Keep bales off the ground on a pallet or rubber mat if your porch gets wet, and plan to replace them once a season. When Halloween is over, the pumpkins compost and the straw mulches your garden beds, so almost nothing goes to waste.
6. DIY Cotton Stem Witch Broom Corner
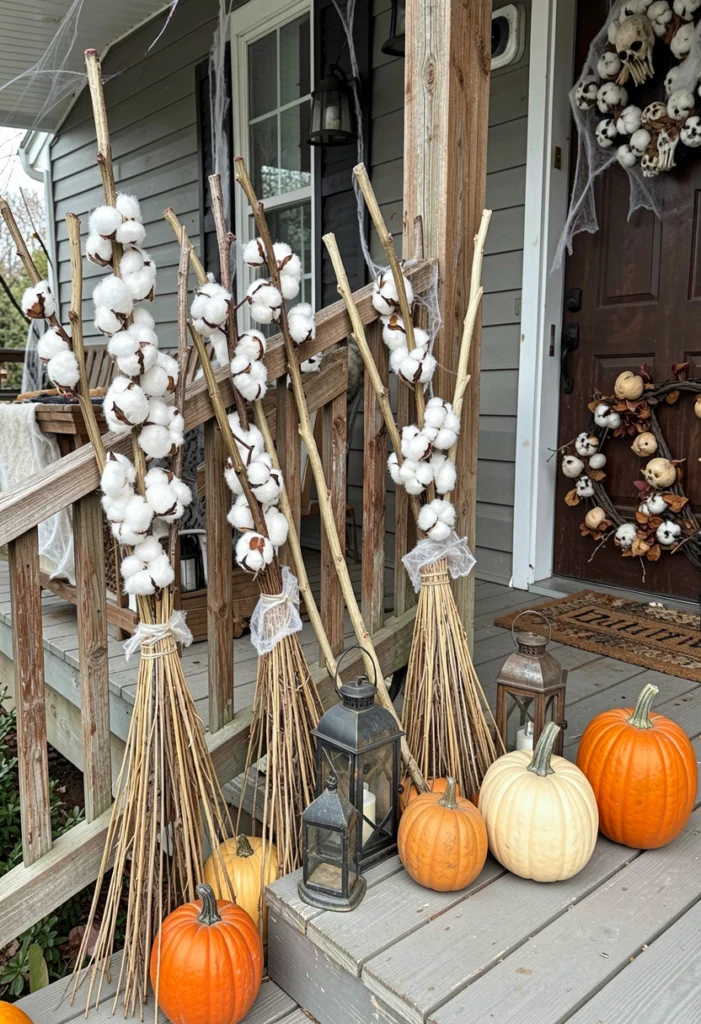
A bundle of brooms leaning against the porch wall reads instantly as “witch lives here” without needing a single store-bought prop. The farmhouse twist is in the materials: dried cotton stems, twine, and natural wood handles instead of plastic. Three brooms of slightly different lengths make the best arrangement.
How to do it: Gather straight twigs or dowel rods for handles, 3 to 4 feet long. Bundle dried twigs or thin branches at the bottom end to form the broom head and bind them tightly with jute twine, wrapping several inches of the twine in a crisscross pattern. Tie dried cotton stems, burlap strips, and faux leaves into the binding for texture. Lean the brooms against the wall near your door at slight angles, tallest in back. Tie a small chalkboard tag reading “parking” to one handle with twine for the classic witch-parking joke, or add a pointed witch hat hung from one broom handle.
Where to find materials: Craft stores sell dried cotton stem bundles in fall, but you can also gather thin branches after trimming yard shrubs; just let them dry fully for a week so they do not bend. If the brooms will face wind, secure each handle to the railing with a hidden zip tie. After Halloween, swap the witchy tags for a plain burlap bow and these same brooms work as rustic porch decor through Thanksgiving.
7. Rustic Spider Web Entry Frame
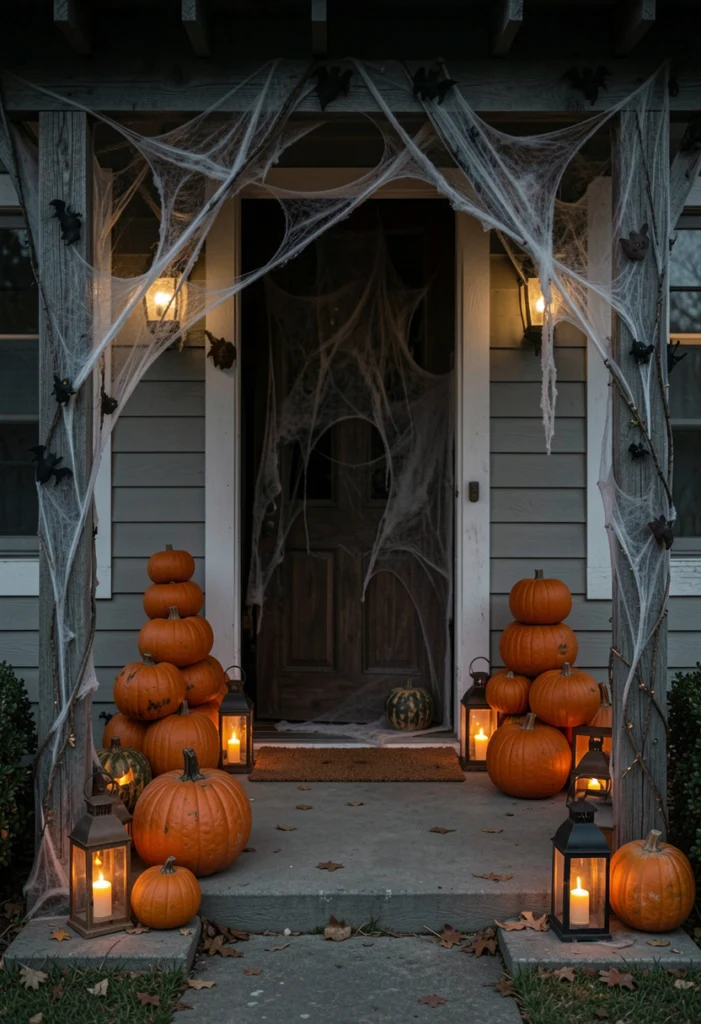
Framing the entire doorway with a giant spider web turns your porch entrance into a scene, which is exactly what trick-or-treaters remember. The farmhouse version uses natural materials, branches or reclaimed wood for the frame and white rope webbing, instead of shiny plastic, so it looks crafted rather than store-bought.
How to do it: Build a rough frame around your door using straight branches lashed together with twine, or screw reclaimed 2 x 2 boards into a rectangle slightly larger than the door opening. Stretch white cotton rope or thick yarn across the frame, anchoring radial lines from the corners to the center first, then weaving spiral lines around them. Pull the spirals slightly loose so the web sags naturally. Add two or three oversized spiders: make them from black yarn pom-poms with pipe-cleaner legs, or buy large fabric ones. Tuck dried leaves and mini pumpkins at the base of the frame and hang two mini lanterns from the top corners to balance the eerie look with warmth.
Wind-proofing: This is the one decoration most likely to blow down, so anchor the frame to the house with screw-in hooks or heavy-duty Command-style outdoor strips rather than leaning it. Keep the walkway clear: mount the web frame at least 6 inches back from the door swing so the door never catches it. Take the web down before big storms; the frame can stay up and be reused next year, which makes the hour of weaving a one-time investment.
8. DIY Painted Pumpkin Barrel Stack
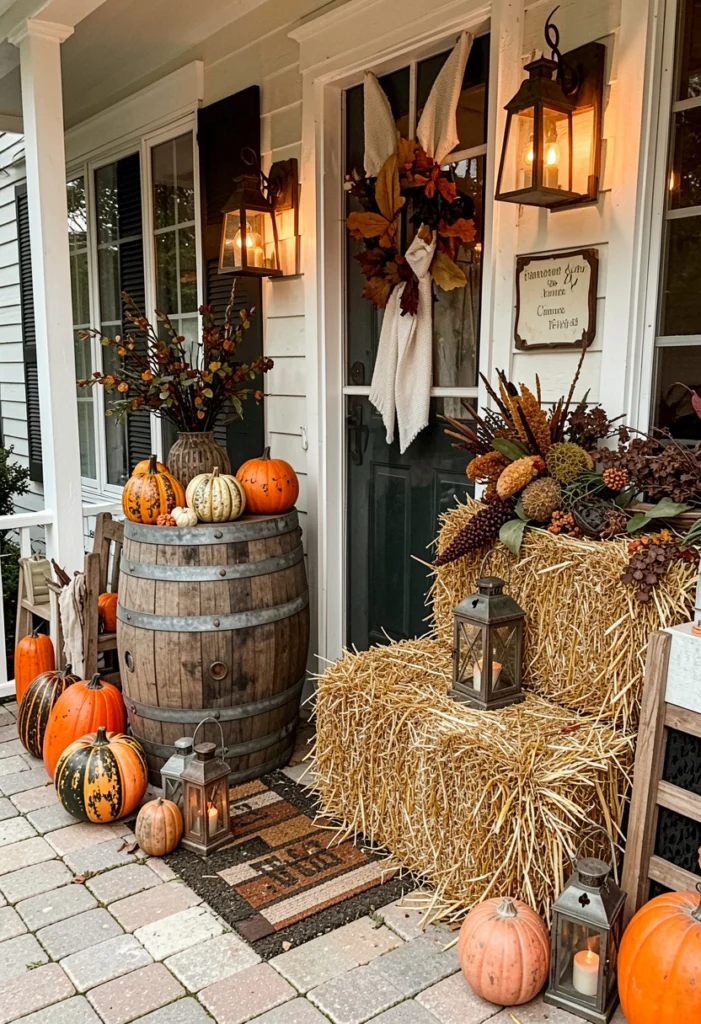
Old wooden barrels have more presence than crates: one barrel at each side of the door creates a symmetrical, substantial entrance that photographs beautifully. Painting the pumpkins instead of carving them keeps the farmhouse palette tight, neutrals with black patterns, and means the display lasts the whole season without rotting faces.
How to do it: Place a half-barrel or whiskey-barrel planter on each side of your door or steps. Fill the barrels with crumpled newspaper or packing foam, then mound soil or dried moss on top so pumpkins sit at different heights. Paint your pumpkins before arranging them: try matte white pumpkins with thin black stripes, natural orange pumpkins with white polka dots, and one or two with simple black Halloween faces or geometric patterns. Use matte acrylic craft paint and seal with outdoor matte sealant. Nestle 5 to 7 pumpkins per barrel, largest in back, smallest in front, and tuck dried leaves and wheat into the gaps.
Pattern advice: Stripes and polka dots are the safest farmhouse patterns because they look intentional even when hand-painted and slightly imperfect. Paint with the pumpkin resting on a paper plate and rotate it as you work. Keep one barrel slightly simpler than the other; matching pairs look best when they are close but not identical. These barrels are heavy enough to stay put in wind, which makes them one of the most low-maintenance ideas on this list. If you are also styling the rest of your entryway, the layouts in our front porch decor ideas guide show how barrels and crates layer with seating and railings.
9. Hanging Mason Jar Lantern Wall
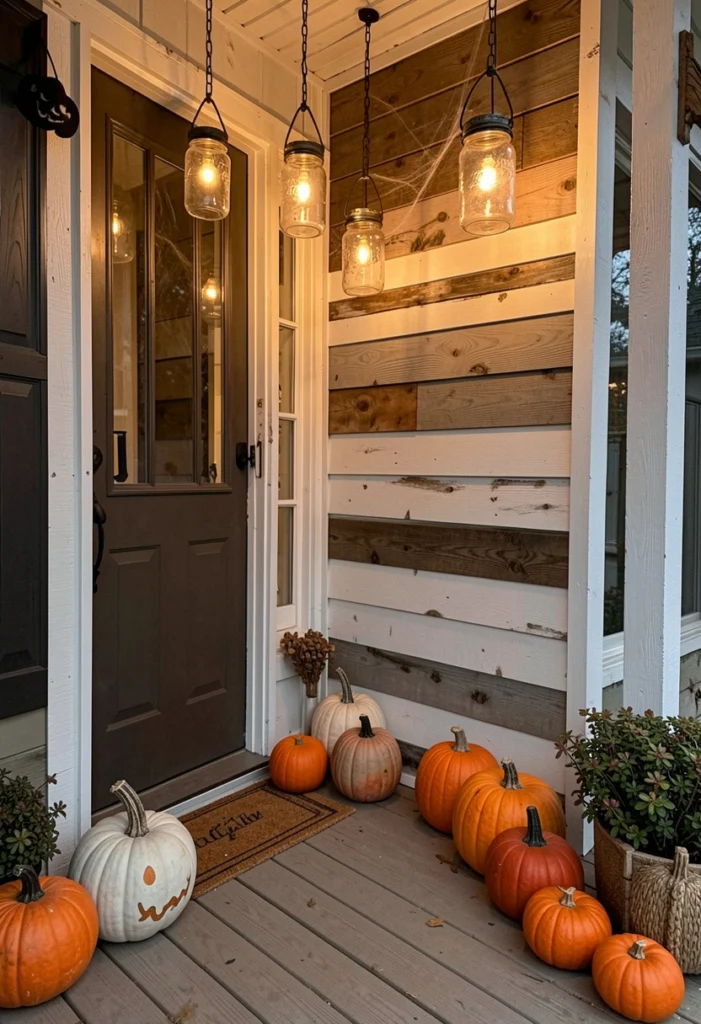
A wall of glowing mason jars is the most atmospheric lighting project here and one of the best uses of a narrow porch wall, because it goes vertical instead of eating floor space. Ten to fifteen jars on a rustic board create a warm, slightly eerie glow that transforms the whole porch after dark, and the project costs less than one store-bought lantern fixture.
How to do it: Mount a weathered board, about 4 feet wide and 2 feet tall, to your porch wall with sturdy brackets. Attach mason jars to the board in a grid using metal hose clamps screwed into the wood, or wrap each jar with twine and hang it from a small nail. Fill each jar with an LED tea light or a 10-light strand of warm fairy lights. Decorate some jars with burlap wraps tied with twine bows, and paint a few with simple Halloween motifs like bats or jack-o’-lantern faces using matte black acrylic on the outside of the glass. Drop a mini pumpkin, acorns, or dried leaves into the jars that hold only fairy lights.
Power options: Battery tea lights with timers are the simplest choice; change batteries once in October. Solar fairy lights work if the wall gets afternoon sun. Keep all wiring outside the jars and above any spot where rain pools. For a smaller porch where a full wall is too much, hang just three jars from the porch ceiling by the door; even that small cluster changes the whole mood at night. See small front porch ideas for more space-saving tricks that work on tiny porches like these.
10. Skeleton Farmhouse Bench Display
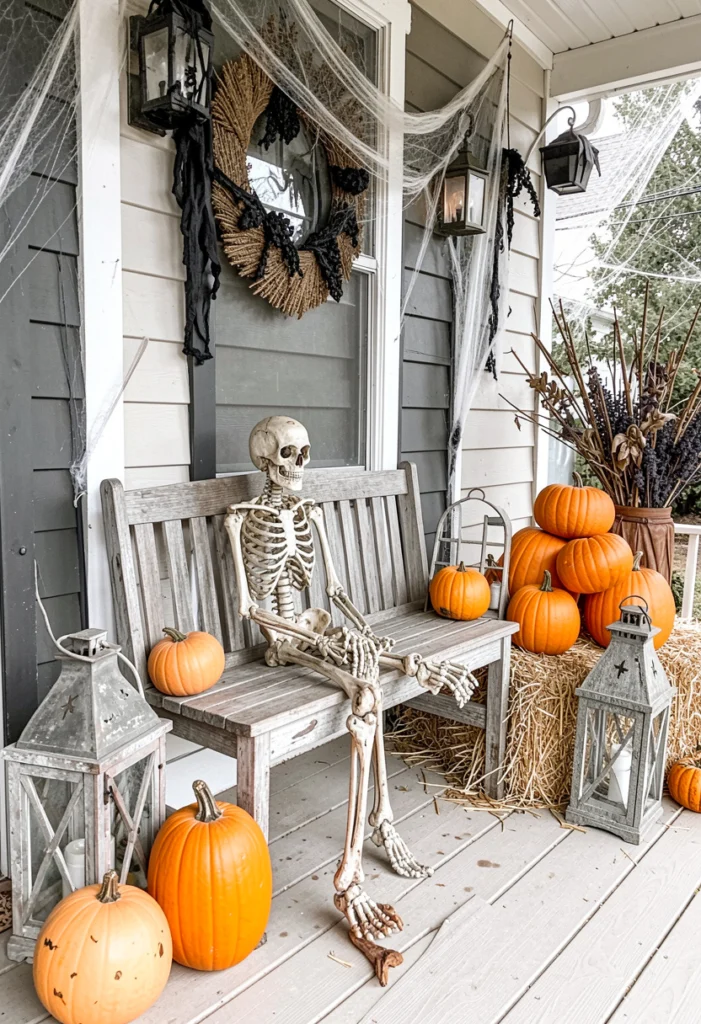
A skeleton in farmhouse clothes is the funniest decoration on this list and the one neighbors photograph most. The humor comes from the contrast: a grinning skeleton dressed in a flannel shirt, jeans, and a straw hat, sitting on a wooden bench like a neighbor waiting for visitors. Life-size poseable skeletons are widely available and cheap in September, so buy early.
How to do it: Place a wooden bench against the porch wall facing the walkway. Sit the skeleton on the bench and dress it: a thrifted flannel shirt, rolled jeans, and a straw hat work perfectly, plus a burlap scarf knotted at the neck. Pose one arm waving and the other holding a small pumpkin or a “welcome” chalkboard sign. Surround the bench with pumpkins, a hay bale, and a lantern so it reads as a scene rather than a lone skeleton. Add a hanging sign above or beside it with a funny line like “Resting Witch Face” or “Stay Awhile.”
Make it last: Poseable skeletons loosen over time, so tighten the joints with a dab of hot glue at the pose points, or wire the limbs to the bench with fishing line. Bring the clothes inside during heavy rain so the flannel does not mildew. This display is a hit with trick-or-treaters, so expect it to become your porch’s signature: plan the bench spot early and style everything else around it. Move the skeleton slightly every few days and kids will notice, which keeps the display entertaining all month.
11. DIY Fall Fabric Rag Garland
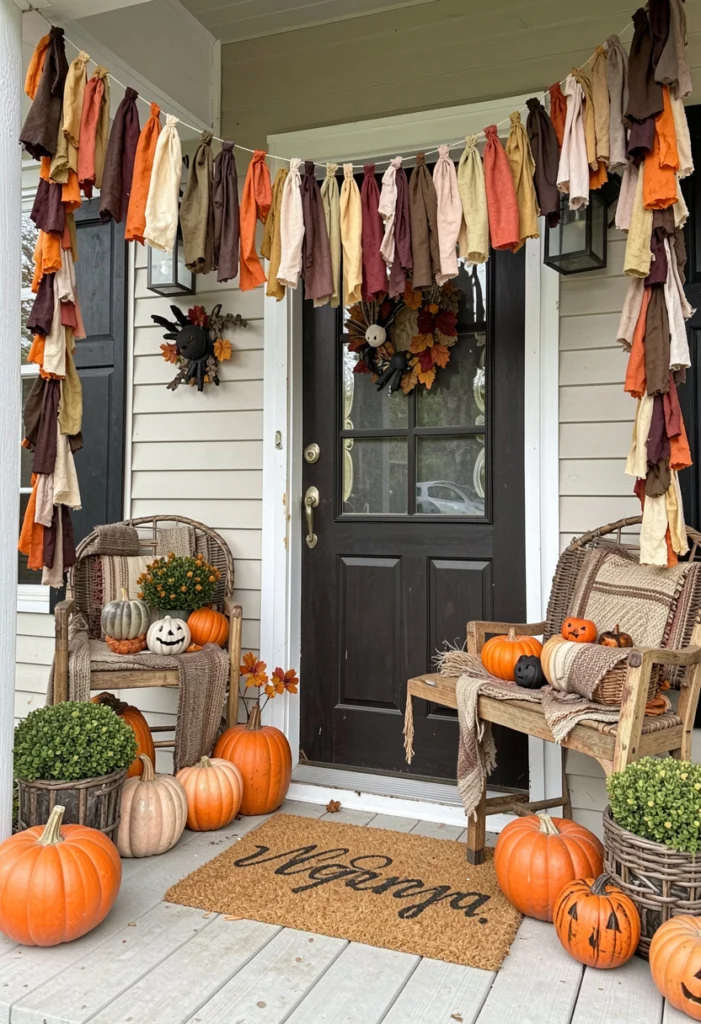
A rag garland is pure farmhouse texture: dozens of fabric strips tied along a length of twine, soft, colorful, and completely handmade. It hangs beautifully across porch railings, door frames, and ceiling beams, and it is one of the best projects for using up fabric scraps. Choose autumn colors with a Halloween accent and the garland works for both October and November.
How to do it: Cut cotton or flannel fabric into strips 1 inch wide and 8 to 10 inches long. Use autumn tones: burnt orange, cream, mustard, olive, and brown, plus black fabric or black-and-white plaid for the Halloween note. Tie each strip onto a long piece of jute twine with a simple overhand knot, pushing the knots close together for a full look. A 6-foot garland needs roughly 100 to 120 strips. Every 8 inches, tie on a wooden bead, a mini pumpkin, or a paper bat cut from black cardstock. Hang the garland with a slight swag between attachment points.
Fabric tips: Old flannel shirts, worn jeans, and clearance fat quarters all work; wash and dry the fabric first so it does not bleed in rain. Pinking-shear the strip ends or let them fray naturally for the rustic look. Make the garland a foot longer than the space it will hang in so it swags nicely instead of stretching taut. After Halloween, remove just the black strips and bats and the same garland carries you through Thanksgiving.
12. Rustic Witch Hat Hanging Display
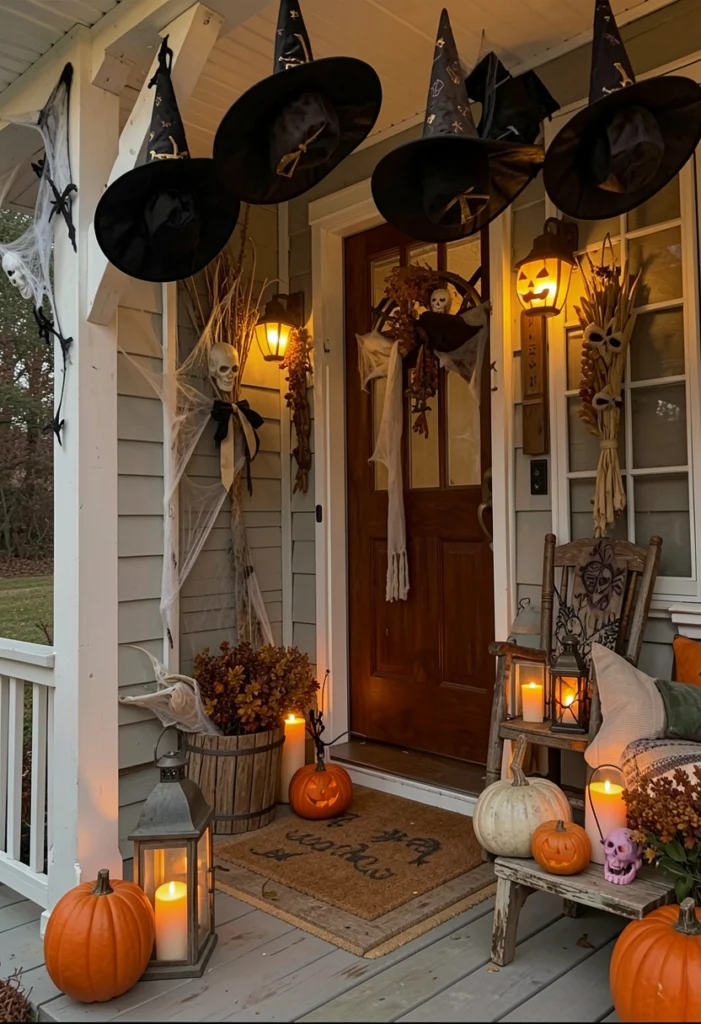
Floating witch hats are the most magical-looking decoration here: hats hung at different heights from the porch ceiling appear to hover in midair, especially at dusk when LED candles glow from inside them. The effect costs very little, black or brown witch hats, fishing line, and battery candles, and it photographs better than almost anything else on this list.
How to do it: Buy 5 to 7 basic witch hats, the cheap fabric kind with a wide brim. Reinforce each hat’s point with a small piece of cardboard rolled into a cone inside, so the hats keep their shape. Tie clear fishing line to the tip of each hat and hang them from the porch ceiling at staggered heights, 2 to 3 feet above head height so nobody walks into them. Tie a burlap ribbon bow around the base of each hat and hot glue on a dried flower or mini pumpkin for the farmhouse touch. Place a battery LED candle inside each hat, angled so the brim hides the candle but the glow spills out from underneath.
Installation advice: Screw small cup hooks into the porch ceiling; they are nearly invisible and hold the hats securely in wind. Stagger the heights by at least 6 inches between neighboring hats so the arrangement reads as floating rather than lined up. Use the flicker-mode LEDs and set them on timers for dusk to midnight. From the sidewalk at night, glowing hats floating over a farmhouse porch is genuinely enchanting, and it is the display trick-or-treaters will ask about.
13. Wooden Crate Potion Station
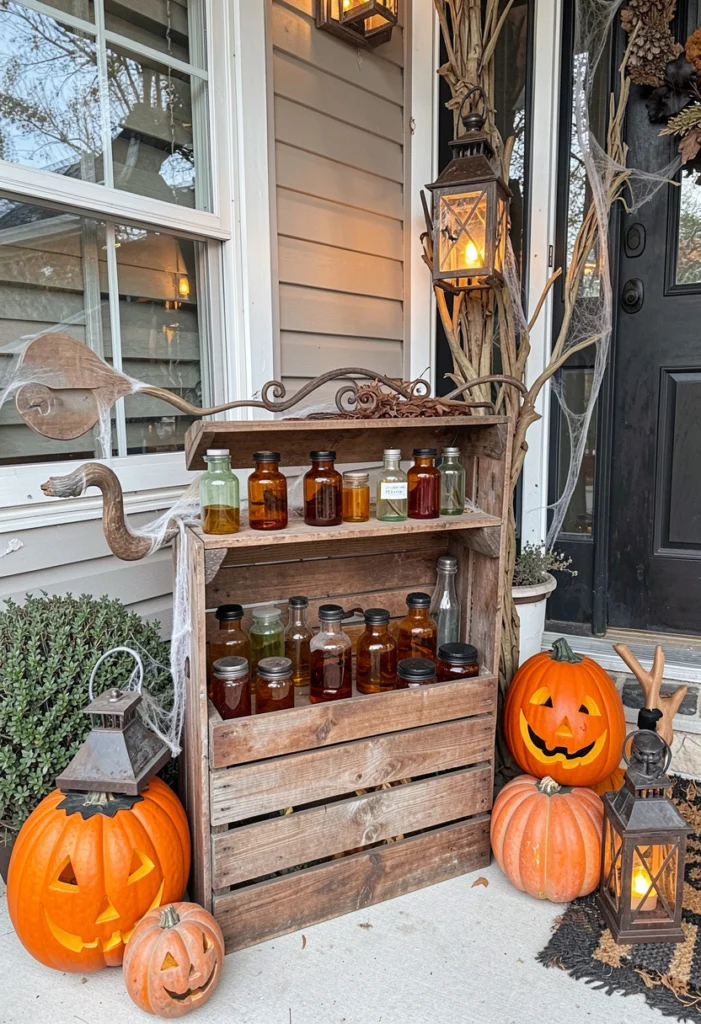
A potion station is the most interactive idea on this list: a small apothecary-style display that doubles as party entertainment. Stacked crates become a display table, labeled jars become “potions,” and guests, especially kids, love reading the labels and peering into the jars. It is decor and a conversation piece in one.
How to do it: Stack two crates as a base and lay a plank across the top as a counter, or set one crate on its side as a shelf. Fill mason jars and old glass bottles with “potions”: water tinted with food coloring, glitter jars, dried herbs, plastic eyeballs, or candy corn layers. Make kraft-paper labels reading “Witch’s Brew,” “Potion Lab,” “Eye of Newt,” and “Spider Venom,” and tie them on with twine. Hang a larger painted sign reading “Witch’s Brew, 5 cents” above the station. Style around it with pumpkins, lanterns, and dried herbs hanging from the crate edges.
Party use: At a Halloween party, turn the station into a drink or candy station: the “potions” become labeled punch, candy jars, or popcorn. For trick-or-treat night, put the candy bowl on the potion table and let the station frame it. Seal the jar lids with hot glue if small children will handle them, and keep anything breakable at the back of the table. After the holiday, the crates, jars, and bottles all go back into regular farmhouse service, which is the best thing about this style: almost everything is reusable. For a matching indoor focal point, our Halloween centerpiece ideas include potion-style table displays that echo this porch setup.
14. Cozy Farmhouse Pumpkin Stair Path
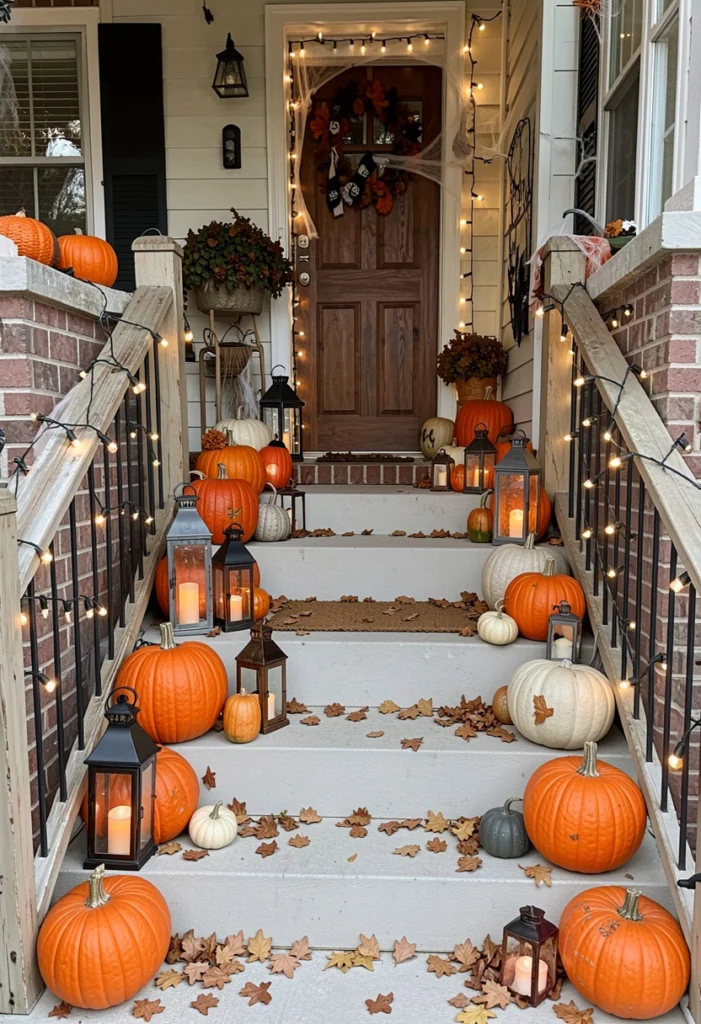
A pumpkin-lined stair path is the simplest idea here and also the most effective at welcoming guests: a trail of glowing pumpkins naturally guides visitors to your door and makes the whole house feel inviting from the street. It needs no tools, no building, and no special skills, just pumpkins and light.
How to do it: Line both sides of your front steps with pumpkins in alternating sizes: large pumpkins on the bottom steps, medium in the middle, minis at the top, or mix them for a more casual look. Weave a strand of warm-white string lights along the edges of the steps, tucking the wire under the pumpkins to hide it. Carve or paint 2 or 3 of the pumpkins so the path has focal points, and leave the rest natural in mixed colors: orange, white, green, and striped. Add a lantern at the top step and scatter dried leaves along the edges for texture.
Keep it safe: Leave the center of each step clear so visitors have a full tread to walk on; a beautiful path that trips someone ruins the night. Use LED candles inside carved pumpkins instead of real flames, and keep string lights rated for outdoor use. Real carved pumpkins last about 5 to 7 days in October weather, so carve them the weekend before Halloween and use painted or faux pumpkins for the early-season display. This stair path is also the perfect finishing touch if you have built any of the bigger displays above; it ties the whole porch together into one cohesive farmhouse Halloween scene.
Final Words
Creating a farmhouse Halloween porch is all about blending rustic charm with playful, spooky details, and DIY projects make it even more special. These 14 ideas let you add a personal touch while keeping your decor warm, inviting, and full of character. From wooden crates and burlap accents to lantern lighting and handmade signs, each element works together to create a cozy yet festive atmosphere.
Start with the one or two projects that excited you most, then add a new display each weekend in October. Because every idea here uses simple materials and forgiving techniques, you can build the whole porch yourself and end the season with decorations you will reuse for years. Happy haunting, and enjoy every minute of making it.
Frequently Asked Questions
How early should I start decorating my porch for Halloween?
Start the farmhouse base layer, crates, hay bales, lanterns, and uncarved pumpkins, in late September or the first week of October. Add the spookier elements like skeletons, spider webs, and potion stations in mid-October, and carve real pumpkins only in the final week before Halloween, since carved pumpkins last 5 to 7 days in fall weather.
How do I keep my outdoor Halloween decorations from blowing away?
Weight is your friend. Use heavy barrels, stacked crates, and hay bales as anchors, and tie lighter items like brooms and hats to them with fishing line or twine. Screw cup hooks into the porch ceiling for hanging displays, keep the walkway clear of anything the wind could push, and take down webbing and fabric garlands before storms. Battery LED lights are lighter and safer than wired ones in wind.
Can I reuse farmhouse Halloween decor for Thanksgiving?
Yes, most of it. Remove the explicitly spooky pieces, skeletons, witch hats, ghost faces, and potion labels, and everything else, crates, lanterns, hay bales, rag garlands, painted pumpkins in neutral tones, transitions straight into Thanksgiving decor. Build your displays with this in mind by keeping the Halloween layer as removable accents on top of a neutral farmhouse base.
How much does it cost to decorate a farmhouse Halloween porch?
A fully styled porch using these DIY ideas typically costs 50 to 150 dollars if you buy the basics new: crates, burlap, twine, LED candles, paint, and a few pumpkins. Costs drop sharply in the second year because nearly everything is reusable. Thrift stores, feed stores for straw bales, and craft store coupons are the best ways to keep the budget down.
Real or fake pumpkins: which is better for porch displays?
Use both. Real pumpkins look and smell authentic and are cheap in October, but they soften in rain and carved ones last about a week. High-quality faux pumpkins cost more upfront but last for years and work for early-season displays. A good strategy is faux pumpkins for the structural displays you build in early October, and real carved pumpkins added in the final week for that fresh Halloween-night look.
More Ideas You Will Love
 20 Creative Christmas Wall Light Ideas to Brighten Your Holiday Decor
 21 Apartment Remodel Ideas – Transform Your Space with Modern Functionality
 17 Vintage DIY Christmas Decor Ideas for 2025 Nostalgia
 14 Girly Apartment Ideas That Are Chic, Cozy & Totally You
 19 Small Entryway Decor Ideas That Are Stylish & Functional
 12 Easy DIY Halloween Porch Decor Ideas You Can Make Today