
15 Scary Halloween Porch Decorations You Can DIY


Your porch is the first thing trick-or-treaters see, and on Halloween night it deserves to make their hearts race a little faster. A scary DIY porch display does not need a big budget or professional props. With dollar-store supplies, a few tools you already own, and one weekend afternoon, you can build a haunted entrance that looks like it walked out of a horror movie.
The secret to a truly frightening porch is layering. One giant spider is fun, but a giant spider plus fog rolling across the floor, plus flickering lantern light, plus a distant creaking sound creates a scene people remember for years. The 15 ideas below work on their own, but they shine brightest when you combine three or four of them into one coordinated scene.
Every project here is beginner friendly and designed for real outdoor conditions. You will find exact materials, step-by-step instructions, and the practical details most tutorials skip: how tall to hang the ghosts, how far apart to space the pumpkins, and how to keep your fog from blowing away on a breezy night.
1. Life-Size Ghost Figures

Nothing says haunted house like ghostly figures drifting in the night air. The classic cheesecloth ghost is cheap, fast to make, and looks shockingly real after dark when a light glows through the fabric.
You will need: white cheesecloth or gauze fabric (about 2 yards per ghost), a foam ball or balloon for the head (6 to 8 inches wide), a wire hanger or tomato cage for the body frame, a cup of white glue mixed with a cup of water, black felt for eyes, and fishing line for hanging.
How to make them: Shape the wire frame into a rough human form, about 3 to 4 feet tall for porch ghosts. Place the foam ball on top as the head. Drape the cheesecloth over the frame so it falls to the ground in flowing folds. Brush the glue-water mixture over the entire cloth until damp, then let it dry for 24 hours. The stiffened cloth will hold its shape even when you remove the frame. Cut two oval eyes and a mouth from black felt and glue them on.
Hang the ghosts from your porch ceiling with fishing line at staggered heights, ideally between 6 and 8 feet off the ground so adults must duck slightly and kids walk right into the scene. For a glowing effect, tape a small LED tea light inside each ghost. Tear a few strips along the bottom edge for a tattered, ancient look.
2. Creepy Crawling Spider Infestation

Oversized spiders trigger an instant, primal reaction, which makes them one of the most effective scary decorations you can build. The key is variety: one giant spider is a decoration, but a dozen spiders of different sizes crawling across your porch is an infestation.
You will need: black balloons or foam balls in sizes from 2 to 10 inches, black pipe cleaners or 16-gauge wire for legs (8 per spider), a hot glue gun, large bags of stretchable spider web, small plastic spiders for filler, and a clip-on spotlight.
How to make them: For each spider, attach eight legs to the body ball, bending each leg into two segments like a real spider’s knee. For the hero spider, use a 10-inch foam ball with 18-inch legs and hang it right beside the front door at eye level. Stretch the fake webbing between porch posts, railings, and corners, pulling it thin so the strands look natural. Press the smaller spiders into the web at random points, with a few “climbing” up the door frame.
Mount the spotlight low, pointing up at the web wall, so the spiders cast huge crawling shadows on your house. That moving shadow is what truly sells the scare. This web-covered look layers beautifully with the rest of your porch; see how the pieces fit together in these easy DIY Halloween porch decor ideas.
3. Haunted Silhouette Windows

Silhouettes are terrifying because your brain fills in the blanks. A black shape moving in a lit window suggests something alive inside, and visitors never quite stop watching it.
You will need: black poster board or foam board, scissors or a craft knife, painter’s tape, and a warm-toned light source behind the window (a lamp, string lights, or an LED strip).
How to make them: Draw and cut classic horror shapes about 12 to 18 inches tall: a witch with a pointed hat, a cat with an arched back, a tall thin figure with long arms, or a face pressed against the glass. Tape the silhouettes to the inside of the window facing out. Place the light source a foot or two behind the cutouts so the shapes read as solid black against a glowing background.
For maximum creepiness, create a scene instead of random shapes: one figure standing in the left window “watching” the porch while a smaller shape peeks from behind a curtain in the right window. Add a slow-flicker bulb (sold as “candle flicker” LEDs) so the light breathes like candlelight. From the sidewalk, your house will look genuinely occupied by something that is not quite human.
4. DIY Foggy Entrance

Fog is the single fastest way to make a porch feel like a movie set. It hides the cheap edges of your decorations, softens the lighting, and makes every prop look like it is emerging from another world.
You will need: a 400-watt fog machine (widely available for under 30 dollars), fog juice, a short length of 4-inch flexible dryer duct, and a shallow plastic tub if you want a low-lying ground fog effect.
How to make it: Place the fog machine behind a prop or bush, out of sight. Attach the dryer duct to the nozzle and run the other end along the ground where you want the fog to spread. For ground-hugging fog on a budget, run the duct through a tub of ice: the chilled fog stays low instead of rising and vanishing.
Time the fog to run in 20-second bursts every couple of minutes rather than continuously. Constant fog blows away and looks thin; bursts build thick waves that roll. Wind is the enemy of outdoor fog, so place a tall decoration or a sheet of cardboard as a windbreak on the windy side. Keep the machine dry with an upside-down storage bin as a rain cover, and never point the hot nozzle where children can touch it. Combine the fog with dim amber lighting for the classic graveyard glow.
5. Skeleton Welcome Scene

Posable plastic skeletons are the workhorses of scary porch decor because you can arrange them into stories. A skeleton couple “greeting” visitors at the door is funny-scary in daylight and genuinely eerie at night.
You will need: one or two 5-foot posable skeletons, old clothes from a thrift store (a suit jacket, a dress, a hat), a lantern or two, and zip ties to hold poses.
How to set the scene: Pose the first skeleton seated in a porch chair, leaning forward with a lantern in its hand as if waiting for guests. Pose the second standing by the door, one bony hand raised in a wave. Dress them in the thrift-store clothes, stuffing newspaper into sleeves so the fabric drapes realistically over the bones. Add a top hat or a tattered shawl for personality.
Light the scene from below with an uplight or a lantern placed on the floor. Under-lighting carves deep shadows into the skull and ribcage that overhead light never achieves. For extra fun, wire a small motion-activated speaker (see idea 12) so the seated skeleton “greets” visitors with a creak or a cackle when they step onto the porch.
6. Blood Drip Door Decor

A blood-drip door is one of the simplest ideas here and one of the most photographed. The dripping red against a dark door reads instantly as horror, even from the street.
You will need: red gel window clings (reusable and renter friendly) or red acrylic paint for a bolder look, a dark door or a black plastic tablecloth as a backdrop, and a sponge for splatter details.
How to make it: Start the drips from the top edge of the door: place a thick horizontal band of red along the top, then drag a brush or your finger downward in uneven streaks of varying lengths, from 6 inches to 2 feet. Vary the drip widths. Thin drips look fresh, wide ones look heavy. Add a few handprints at doorknob height by pressing a gloved hand into red paint and stamping the door.
If you rent, use the gel clings on the glass storm door instead of paint; they peel off cleanly on November 1st. This door treatment becomes the anchor of your whole display, so keep the decorations around it minimal and let the red do the talking. Pair it with a dark wreath or hanging chains for a full horror-movie entrance; a matching door mat completes the threshold, and these DIY Halloween door mat ideas include several that fit a scary theme perfectly.
7. Glowing Jack-O’-Lantern Pathway

A path of glowing pumpkins pulls visitors toward your door like a runway into the haunted house. The flickering faces also give trick-or-treaters something to look at while they wait, which builds anticipation.
You will need: 6 to 10 pumpkins (real or foam craft pumpkins), carving tools or a craft knife, and flameless LED candles or tea lights, one per pumpkin.
How to make them: Carve each pumpkin with a different expression: classic triangle eyes, a screaming mouth, a one-eyed monster, a vampire grin. Vary the sizes, placing the largest pumpkins nearest the door and smaller ones toward the sidewalk for a forced-perspective effect. Space them 3 to 4 feet apart on alternating sides of the walkway. Drop an LED candle inside each one and switch them on at dusk.
Real pumpkins last about 5 to 7 days once carved, so carve them the weekend before Halloween. Foam pumpkins cost more upfront but can be reused for years and survive rain. Scatter a few handfuls of dried leaves or straw around the bases and let a little fog (idea 4) drift between them. Never use real candles in pumpkins on a wooden porch; LED lights give the same flicker with zero fire risk. For more ways to dress the yard leading up to this pathway, these outdoor Halloween decor ideas cover the full approach.
8. Hanging Witch Hats with Lights

Floating witch hats are the rare decoration that is both magical and menacing. By day they look whimsical; by night, when they glow from within and sway in the breeze, they turn sinister.
You will need: 5 to 8 inexpensive witch hats (party stores sell them for a dollar or two each), clear fishing line, small LED tea lights or fairy light strands, and cup hooks screwed into the porch ceiling.
How to make them: Screw cup hooks into the porch ceiling in a loose cluster, spacing them 2 to 3 feet apart. Cut fishing line in varying lengths from 1 to 3 feet and tie one end to each hook and the other inside the tip of each hat. Tuck a lit LED tea light into the crown of each hat so the fabric glows from within.
The varying line lengths are the key detail: hats floating at different heights look like they are drifting down from the sky. A light breeze will set them swaying, and the moving glow catches the eye from down the street. Use warm white LEDs for a classic look or green LEDs for a wicked-witch glow. This is a great project for kids to help with, since there is no carving, no paint, and no tools beyond scissors.
9. DIY Coffin Prop

A full-size coffin leaning against your porch wall is an instant centerpiece. It is bigger than anything else on the porch, which makes it the thing every visitor remembers and photographs.
You will need: large cardboard boxes or 1/4-inch plywood (a 6-foot coffin needs about one 4×8 sheet), black and dark brown paint, a jigsaw or box cutter, wood glue or hot glue, and optional hinges for a working lid.
How to make it: Cut the classic hexagonal coffin shape: 6 feet long, 2 feet wide at the shoulders, tapering to 1 foot at the feet. For the cardboard version, cut two identical side panels and hot-glue them to a back panel with 6-inch-wide side strips. Paint the whole thing matte black, then dry-brush dark brown over the edges for an aged, weathered finish. Add rope handles on the sides using cabinet pulls or thick cord.
Lean the coffin against the wall at a slight angle, lid slightly ajar, with a skeleton hand (idea 11) reaching out from inside. If you build it from plywood, it will survive rain and last for years; the cardboard version is a one-season prop but costs almost nothing. Keep it under the porch roof so it stays dry, and anchor it with a sandbag behind it on windy nights.
10. Creepy Doll Corner

Creepy dolls work on a deep, uncomfortable level. Their stillness is the scare: while everything else on the porch moves in the wind, the dolls just stare.
You will need: old dolls from thrift stores (the cheaper and more worn, the better), black and red acrylic paint, sandpaper, an old wooden chair or crate, and a battery-operated candle.
How to make them: Rough up the dolls’ faces lightly with sandpaper, then smudge black paint around the eyes like running mascara and add thin red cracks with a fine brush. Tear their clothes and stain them with watered-down brown paint. Arrange 3 to 5 dolls on and around the chair in one dim corner of the porch: one seated, one slumped against a leg, one lying face-down.
Place the flickering candle a few feet away so the light barely reaches them. Half-lit dolls are far scarier than fully lit ones. Do not overcrowd this corner; the power of the display is in its quiet stillness against the busier decorations elsewhere. This is also the one display to keep slightly back from the walkway so small children are not forced to walk right past it.
11. Zombie Hand Garden

Hands clawing up out of the ground suggest the dead are rising right in your yard. It is gory, it is fun, and kids absolutely love it.
You will need: old work gloves or rubber gloves, polyester stuffing or crumpled newspaper, gray-green and brown acrylic paint, garden soil or mulch, and small potted plants or a garden bed near the porch.
How to make them: Stuff each glove firmly so the fingers hold a clawed curl, then paint the gloves in mottled gray-green tones with darker shading between the fingers. Bury the cuff end 4 to 6 inches deep in soil or a large planter so the hand appears to be pushing up from below. Arrange 5 to 8 hands at different angles: some reaching straight up, some clawing sideways.
Mound dark mulch around each wrist to hide the glove cuff completely. For night viewing, stick a small green or purple LED stake light low among the hands; the colored uplight makes the scene look radioactive. If you do not have a garden bed, use three large planters flanking the porch steps. The hands also look great emerging from the fog in idea 4, as if the mist is hiding something rising.
12. Eerie Sound Effects Setup

Sound is the decoration most people forget, and it is the one that turns a nice display into a genuinely frightening experience. Visitors can close their eyes to a spider, but they cannot close their ears.
You will need: a small Bluetooth speaker (any old one works), a phone or MP3 player, and optionally a cheap motion sensor outlet adapter.
How to set it up: Hide the speaker inside a hollow prop: a foam pumpkin, behind the coffin, or inside a bush near the walkway. The hidden source is critical; visible speakers ruin the illusion. Build a 30 to 45 minute playlist of layered sounds: wind and creaking wood as a constant bed, with distant whispers, a slow heartbeat, and occasional sharp sounds like a scream or a slamming door every 5 to 7 minutes.
Keep the volume low enough that neighbors hear only a faint murmur but visitors on the porch feel surrounded. If you use a motion sensor adapter, the sharp sounds trigger only when someone approaches, which is far scarier than a loop. Test the whole setup after dark before Halloween night. A well-timed creak as someone reaches for the candy bowl is worth more than any prop.
13. Hanging Bat Swarm

A swarm of bats bursting across your porch ceiling creates instant movement and chaos. It fills the “dead space” above eye level that most decorators ignore.
You will need: black craft foam or heavy cardstock, a bat template (print one in three sizes: 6, 9, and 12 inch wingspans), scissors, fishing line or black thread, and tape or push pins.
How to make them: Trace and cut 20 to 30 bats in mixed sizes. Fold each bat slightly along the body so the wings angle upward like a real bat in flight. Hang them from the porch ceiling with fishing line cut to different lengths, from 6 inches to 2 feet, clustering them densely near one corner as if they are pouring out of the attic, then scattering a few across the rest of the ceiling.
Angle the bats in different directions; a swarm where every bat faces the same way looks fake. Add a spotlight aimed across the ceiling so the bats throw dancing shadows on the wall behind them. On a breezy night the whole swarm trembles and shifts, which is wonderfully unsettling. This pairs perfectly with the floating witch hats in idea 8 for a full haunted-sky effect.
14. Broken Mirror Illusion

A shattered mirror suggests violence and bad luck in one glance. The cracked, reflective surface also catches porch light in unpredictable ways, making the decoration feel alive.
You will need: a lightweight “mirror” (use reflective mylar or mirrored acrylic, never real glass outdoors), a black permanent marker, and a picture-hanging hook or easel.
How to make it: Draw a spiderweb of cracks radiating from one impact point near the center of the mirrored surface. Make the lines uneven: some long and jagged, some short. Add a few “shard” lines that do not connect to the center, which makes the break look more natural. Mount the mirror on the porch wall at face height, tilted very slightly downward.
Place a dim light nearby so the cracks catch highlights as visitors move past. The reflection shifts with every step, which keeps drawing the eye back. For extra story, smear a single red handprint (gel cling or washable paint) in one corner of the mirror. Keep this decoration under cover; even acrylic mirrors look better without rain spots, and mylar wrinkles if it gets soaked.
15. Shadowy Figure Cutout

This is the simplest build on the list and possibly the scariest. A human-shaped shadow where no human stands triggers the oldest fear of all: being watched.
You will need: a large sheet of black cardboard, foam board, or black fabric stretched over a frame; scissors; and a bright light source placed behind the cutout.
How to make it: Cut a life-size human silhouette about 5 and a half feet tall. Keep the shape vague: a head, shoulders, and a long coat-like body with no facial features and slightly too-long arms. Vagueness is the point; a detailed figure looks like a decoration, while a blurry shape looks like a presence. Stand it in a dark corner of the porch or half-hidden behind a curtain, with a bright light 3 to 4 feet behind it.
The backlight throws a huge looming shadow onto the wall or the house siding behind the figure, doubling the effect. From the sidewalk, visitors see the shadow first and the figure second, which is a perfect one-two scare. Move the figure a few inches to a new spot each night in the week before Halloween; repeat visitors will swear it is getting closer.
Final Words
Building a scary Halloween porch is really about committing to a scene. Pick three or four ideas from this list that share a mood, maybe the fog, the skeletons, the spider infestation, and the sound effects, and build them to work together instead of scattering fifteen unrelated props across the porch. Layered lighting, hidden sound, and one big centerpiece will always beat a larger number of small decorations.
Start early in October so you can test everything after dark at least once before the big night. Walk your own walkway as a visitor would, and fix whatever does not read well from ten feet away. If the entrance still needs a finishing touch at the door itself, these Halloween door decoration ideas will help you complete the look from threshold to rooftop.
Frequently Asked Questions
How can I make my Halloween porch scary on a budget?
Focus on lighting, sound, and silhouettes, which cost almost nothing but create the biggest impact. Black poster board cutouts, a hidden Bluetooth speaker with free horror soundtracks, and under-lighting your existing decorations with LED tea lights can transform a porch for under 20 dollars. Thrift stores are gold mines for old dolls, clothes for skeletons, and picture frames for creepy displays.
How do I keep outdoor Halloween decorations from blowing away?
Anchor everything. Use sandbags or bricks hidden behind props, fishing line tied to porch railings for hanging items, and ground stakes for anything in the yard. Bring lightweight foam and cardboard props under cover when storms are forecast, and choose plywood over cardboard for any prop you want to reuse next year. Test your setup on a windy evening before Halloween night.
Are fog machines safe to use on a porch with kids around?
Yes, with basic precautions. Keep the machine itself behind a prop or barrier where children cannot touch the hot nozzle, and use only water-based fog juice, which is non-toxic. Run the fog in short bursts rather than continuously so the walkway stays visible, and keep the machine dry under an upside-down bin. Dry ice is a cheaper alternative but requires gloves and adult handling, so a small electric fog machine is the safer family choice.
What lighting works best for a scary Halloween porch?
Low, colored, and flickering light beats bright white light every time. Use amber, green, or purple LEDs placed low to the ground so they cast long upward shadows. Flicker-effect bulbs mimic candlelight and make static props feel alive. Avoid lighting the porch evenly; deep shadows are what make a display scary, so light only the props you want seen and let the rest disappear into darkness.
When should I set up my scary Halloween porch decorations?
Put up the sturdy, weatherproof pieces in early October so you can enjoy them all month and test the lighting and sound after dark. Save fragile items like carved real pumpkins for the final week, since they only last 5 to 7 days once cut. Do a full walkthrough on the weekend before Halloween, viewing the porch from the sidewalk exactly as visitors will see it.
More Ideas You Will Love
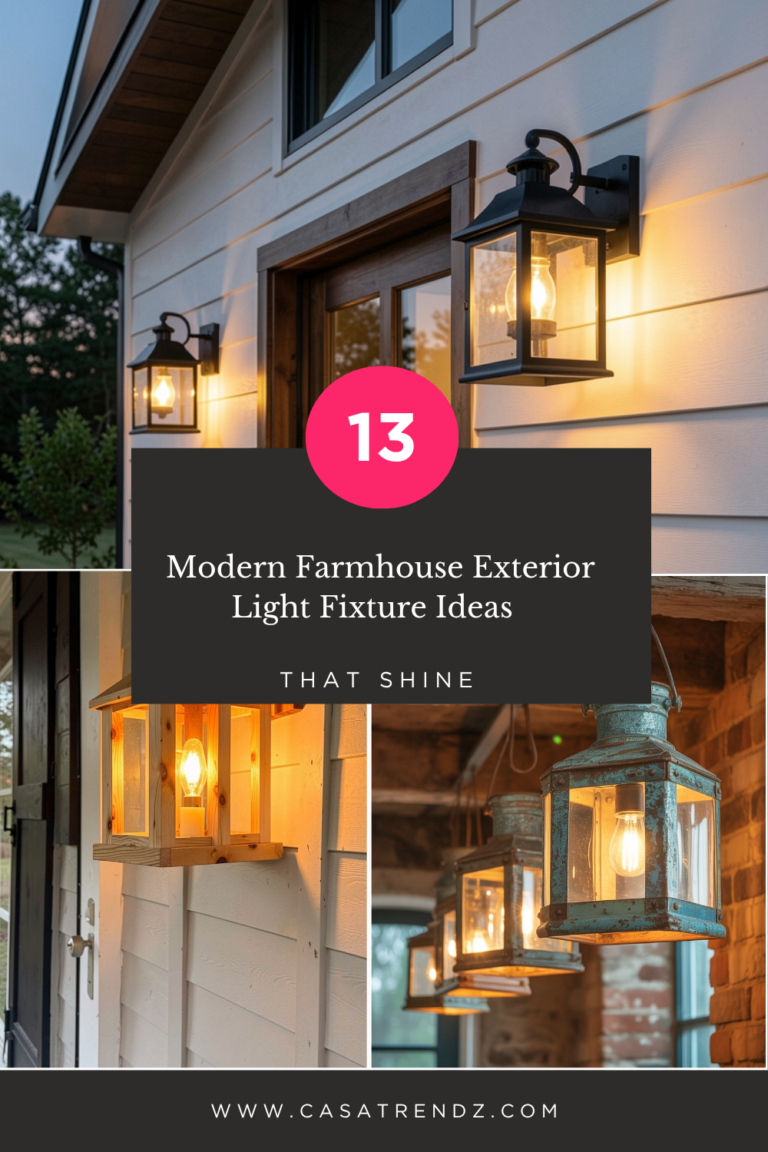 13 Modern Farmhouse Exterior Light Fixture Ideas That Shine
 17 Barndominium Floor Design Ideas for Every Style and Plan
 20 Double Door Exterior Ideas: Elegant Entryways for Modern Homes
 19 Small Entryway Decor Ideas That Are Stylish & Functional
 15 Easy Maintenance Tips for Backyard Pools: Cleaning & Care Guide
 11 Green House Exterior Ideas: Stylish & Inviting Designs